Photo of a kindle inside a fathers day picture frame and displaying weather conditions

Found an excuse to finally spend some of the weekend building this weather display. Excuse the sub-par display, it looks better in person. While cutting up the plastic to use as a light prism, I scratched it a few times.

The frame has been empty for 3 years, since my kid, via the wife, purchased it. I never really felt I had anything to put inside, until I found the frame again recently, and realized it could just barely fit a Kindle. The kid had worked on a server and script with me previously for a Kindle conference room schedule for ... a client (needing to charge once a month, it was framed in black, and attached to the glass from the inside giving it a very future-like look). As such, it made sense to place something that the kid and I worked on inside the fathers-day frame. Well, the concept anyway. Kid was not as excited about working on one for our house, but it still has some of his help and suggestions from a few months back. So it still counts as our project.

The LEDs are green christmas tree lights, and they are connected to the contact pads on the back of the kindle. The light prism came from a damaged Dell LCD; the clear part inside the panel itself that spreads the light. The frame itself had a second larger opening on the opposite side, to hold the Kindle. I should be receiving some damaged LCDs soon to pull a better looking prism out.

It also works as emergency lighting: since the LEDs are powered by the internal battery, if the power goes out, it still works.
We have other LED 'emergency' lights in the house, but they are not setup to turn on when there is no power except for the office ones powered by a laptop battery.

Information referenced for building this based on several posts about it on the internet, and my own previous experience turning them into schedules:

Side note: I just started a Patreon for my other projects: OpenDyslexic, Overlays! and other educational and accessibility software. See how you can help here: https://www.patreon.com/opendyslexic

In 2001, the titanium PowerBook G4 was released. The design was very... bland... next to the PowerBook G3, and had a wide screen, which I hated at the time. Since 2001, I have waited for another laptop design I would want, purchasing devices I needed while I waited.

2003 was a new release, and the design became more plain. The stylish keyboard with the italicized Futura was replaced with something more ... normal. The clear grey text on the silver backlit keys made seeing the keyboard without the backlight on, or anywhere but a dark room.

The MacBook Pro line had some good improvements, but never really in it's design. It seemingly regressed with a lower resolution, larger bezels, and increasingly less friendly ways to upgrade. The newest Retina-screen MacBook Pros, with their thin chassis and new colors are still plain and even more expensive for seemingly backward moving specs (even though its still highly desirable). They finally come with 32Gb of RAM, and USB-C makes them better to use, but it's still rather dull.

I'd get by if Lenovo's ran macOS without needing to part waters.

Regardless, I wanted a PowerBook G3 for the longest time, and since I had some free time, I was going to make it happen. No more waiting on manufacturers to make my dream laptop: if I wanted it done right (or as much as possible), I needed to do it myself.

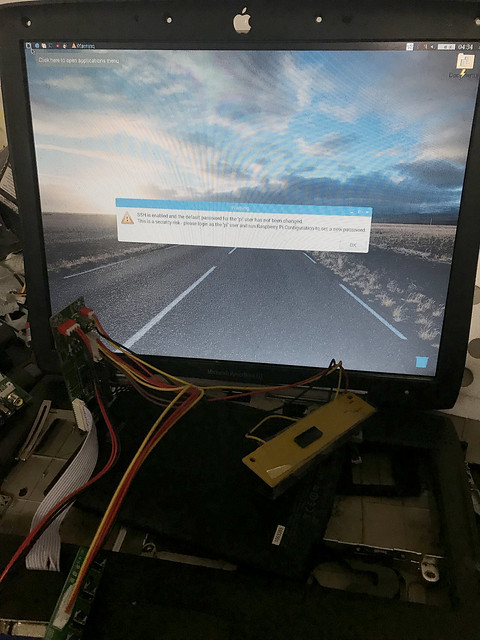
The shell is a Powerbook G3 of course. It's powered temporarily by a Raspberry Pi 3 (being replaced with an actual board supporting SSDs, etc later), and the 1024 x 768 PowerBook display was replaced with a 1400 x 1050 LCD removed from an old Dell.
https://flic.kr/p/2ajYgQy

It works. It boots, and is usable, has sound, but is still missing the keyboard and trackpad. I'm temporarily using the wonderful TypeMatrix keyboard in Dvorak at the moment (fits in the keyboard area perfectly), but I have two plans for this:

  • I pulled a key scanner from an old USB Dell keyboard, and am soldering the PowerBook keyboard (now arranged as Dvorak) to it. It already tests well, even though the wrong keys show. :)

  • I have an 11" display from an X100e (never buy that laptop, its awful) that almost fits in the PowerBook. If I remove the touchpad, it fits perfectly inside, and I can have a touch-keyboard that can be contextual, used as a giant trackpad, and cause the PowerBook to look very much like an old SpyMac photoshop. This one has to wait until I can figure out the LVDS(?) pinouts for the display.

The parts in this come from several Dell laptops, Mac Mini, G5 Powermac, and more. There are a few iPhone parts in it at the moment also, where it's used to replace larger components (tact switches, some resisters to replace ones I blew out, etc). This project has the highest reuse of parts, with the only items purchased new being the LCD board, raspberry pi, and the HDMI-VGA adapter. I'm powering it with a 12v 5amp adapter (which blew out the previous video controller, confirming what it was rated for wasn't what it was capable of).

Next week or the week after, it should be usable enough to carry around. Depending on how the rest of the year goes, I may replace Glyphs app with FontForge for working with OpenDyslexic, and finally try to move my work over to Linux software.

Side note: I just started a Patreon for my other projects: OpenDyslexic, Overlays! and other educational and accessibility software. See how you can help here: https://www.patreon.com/opendyslexic

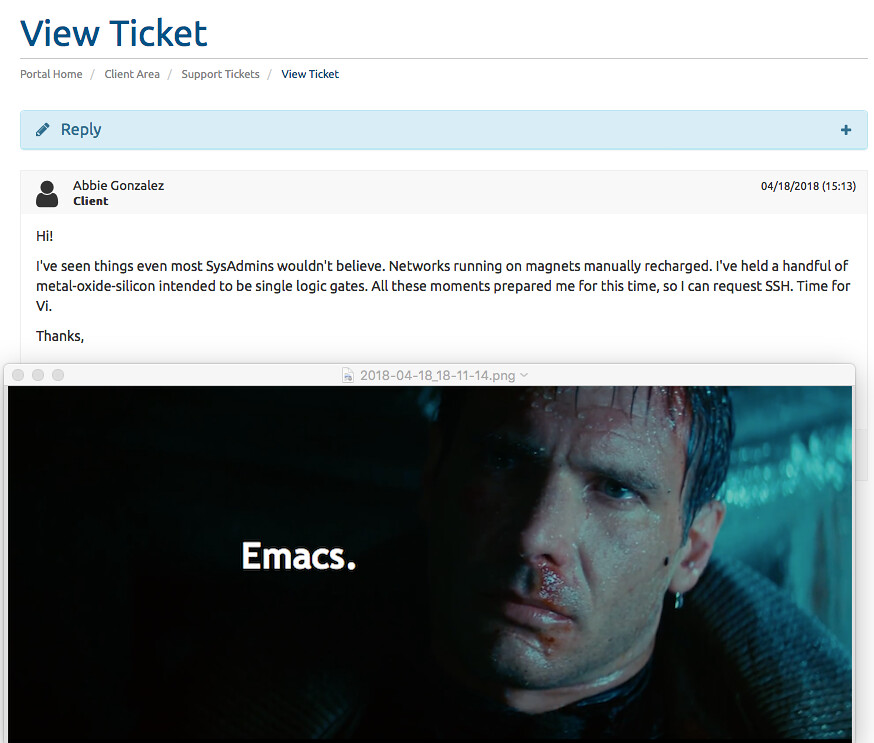
I had to answer that question to get ssh access.

So I made it worth it.

https://flic.kr/p/25poraA

Motivated only to keep our amiibos out of the hands our crazed 2 year old, I purchased some NFC cards to copy our amiibos to. Then if he chews the card, we won't be as heart-broken, right?

I can't remember how, but somewhere along the line, I saw Breath of the Wild cards styled like Magic the Gathering. I had to have that as an NFC. HAD TO HAVE

So, I purchased a set of NFC cards, credit card sized, and started looking at printing on them.

We have a black & white laser printer that I purchased a few years back for around $70 on clearance. We're still on the starter cartridge. I'm also cheap, so instead of getting a proper setup, I tried a variety of ways to get the cards printed on without purchasing anything extra, using everything from acetone to glue.

After finding a color laser printer, also for $70 on clearance, we got serious about it, purchased some supplies, wax paper, parchment paper, sticker paper, decal paper, jammed some pages, and ruined some furniture. But in the end, we had Breath of the Wild amiibo cards.

MtG BotW cards, with a Pokemon style Detective Pickachu
https://flic.kr/p/25wsg2j

The current Zelda set below. Some of these are from a reddit post I can't find now, that had printable MtG Zelda cards. I made them taller, and erased the content and replaced with BotW drops. The Wolf Link is different.

https://flic.kr/p/HCWriF

The Wolf Link is a 20 heart Wolf Link (it's not cheating if it's just a variable :) ), so I wanted to make it special: full card background, Wolf Link overlapping the title, etc.
It needed something else though, so glossy Mod Podge was added to Wolf Link, and extra was added to Link.

https://flic.kr/p/26cnkyw

The final process is probably going to be the official one everyone does: Photo Medium, then matte or glossy Mod Podge to cover.
I might still use the decals though. If done correctly, it looks much better than a paper transfer.

Crazed. Synonyms: Demonic, Two year old, Toddler.
He's not demonic, he's just two. He likes to eat amiibos, starship models and homework. Only some kind of eff'd up, evil parents would call their kids demonic.